
This is a picture from the article.
I'm a fan of simple projects like this. There are many options, frets or fret-less, acoustic or electric, home built box or cigar box, 3 string or 4 string..... The options are up to the builder and the only limit is your imagination. These guitars beg to be built with "found" materials and to stay true to the spirit of the CBG they should be.
While using only found materials for this build is very tempting and I went back and forth, I wanted the first build to be as painless as possible so I settled on ordering most of the materials. I plan on building more than one of these so I can add more "found" parts in later versions.
Fret wire, tuner pegs and piezo pick ups are on the way. I also found cigar boxes for sale on line and have a few on their way.
Fret wire, tuner pegs and piezo pick ups are on the way. I also found cigar boxes for sale on line and have a few on their way.
To get started I went to the local big box hardware store and bought a 1X2" piece of oak 6' long. If all goes well I should be able to get 2 necks out of it.

I cut the oak board in half.

I just eyeballed the angle for my scarf joint and drew some layout lines. I managed to get a pretty good cut.


The cut needed some cleaning up, so I used a hand file to get the cut as straight and smooth as I could.

To keep the joint from slipping during glue up and to add some strength I pinned it with two 1/4" dowels.

Glued up and and clamped, I'll let it sit over night with the clamps on.

After the glue set up over night I removed the clamps and cut the dowels off flush. I'll get out the sander and smooth everything out later in the build.

I found a fret calculator on line and used that to print out a template. It took two pages for the 24" scale with 24 frets. I cut a notch in one sheet so they could be lined up.

I trimmed the excess paper and taped the template to the neck.

To mark the fret placement I used a square and a razor knife.

It worked very well.

I'll cut the slots for the frets with a coping saw, the cuts made with the razor knife should help guide the saw.
While I do have cigar boxes ordered they aren't going to be delivered until next week. Since the license plate guitar is what inspired me I stopped at an Antique store and picked up a license plate with just the right amount of patina.


Using the dimensions of the license plate I built a box for the body of the guitar out of 1/2"X3" Poplar. I didn't take any pictures of this part of the build but it's pretty straight forward, miter joints for the corners and blocks to reinforce each corner.

One small mishap with the router while I was thinning down the neck to keep the fingerboard above the level of the license plate. No harm done, it will be covered by the license plate.

I cut the notches for the neck and cleaned them up with wood chisels. The bridge end of the neck will sit in a pocket, I'm hoping this will add strength.

Things are coming together. The box survived the cutting of the notches, I have one more block to glue in so I can use the existing holes in the license plate to screw it down.

C.B. Gitty did a fine job on my order and the parts showed up very quickly.

Piezo Pickups and wiring kit, strings, tuners and fret wire.

The coping saw worked for cutting the fret slots, I did end up having to remove the set from the teeth to get the slot a little narrower.

The fret wire came in 8 inch pieces, I got 5 frets from each piece. There are 15 frets on my neck so I only used 3 pieces of fret wire. I used a piece of scrap Poplar and a ball peen hammer to drive the frets home.

I learned a few things on my first neck, I need to modify my side cutters so they will cut the fret wire closer to the finger board. (less filing) and I need to take more time cutting the fret slots, the last two I cut I wasn't paying close enough attention and they ended up not perfectly parallel.

I filed the ends of the frets even with the edge of the neck and rounded over the square corners on the back of the neck. I followed the directions that came with the tuners and drilled the holes for them.

The dowels I used to pin the scarf joint were right where the tuners needed to go. Not a huge deal just another lesson learned. I figure by my third or fourth guitar I should have most of the big mistakes out of the way.

I cut a slot for the nut to fit in. Is it ironic that I'm using a bolt for the nut? Maybe not....
I had a 1/4" brass bolt in my parts stash, I cut it down to 1 1/2" to match the width of the neck.

I used a two part epoxy to glue the nut in place. I put painters tape around the nut to keep the excess epoxy from getting on the fingerboard and head.

A place I should have measured twice. When I drilled the holes for the tuners, the holes on the left (in the picture) ended up about 1/8" farther in than the ones on the right.


I used screws along with glue to attach the neck to the box. The hinge will serve as the tailpiece after I drill four holes for the strings to go through. The screws that fasten the hinge to the body also screw into the end of the neck.

The licence plate attached

I cut the "legs" off a brass drawer pull to serve as the bridge. With the strings installed it now makes noise! I still need to make a back, maybe another licence plate. I have some 1/4" plywood and may end up using it for the back.
My licence plate guitar does produce sound but doesn't have much volume when played as an acoustic. I went with a through the body neck there isn't room for a magnetic pick-up without making major modifications. When I started this build I had planned to add a piezo pick up and had ordered a kit that included a volume control, 1/4" jack, 2 piezo pick ups and wire.
I laid out the holes for the jack and volume control so they would clear the blocks inside the body.

The piezo kit came with a wiring diagram that is easy to follow. I have a soldering iron and all the other stuff needed to put this kit together.

I glued the piezo to a wood block so I could mount it in different locations if needed.
I tried mounting it on the neck forward of the bridge.

The piezo works, tapping on the pick up can be heard through the amp. However it's not picking up the sound from the strings. I have a feeling the licence plate isn't transferring the string vibrations into the neck or body since it is only attached with four screws.

I tried removing the wood block from the piezo and attached the piezo to the licence plate instead of the neck, not much improvement. Then I added the second piezo and attached it to the licence plate also, still no joy. I have to crank the amp way up to hear anything. Then I got out my distortion pedal and hooked it up, that made all the difference. The piezos just needed a bit of a boost. I still need to do some tweaking as I'm getting a lot of noise transmitted through the body and neck. The piezo discs are more sensitive to the mechanical vibrations transmitted through the wood and metal by touching it than the vibrations of the strings. I have read of builders liking the piezo rods that are mounted in the bridge, I may have to try that in a future build. Before I do that I want to wind my own magnetic pick up.....
Then I got a little side tracked .....
Santa is bringing me a 9 volt amp kit for Christmas and I just need a speaker, since it isn't included in the kit. A trip to a pawn shop and I found a couple candidates to donate their parts, a computer speaker and a small Sony speaker.

At $1 each, even if they aren't what I need I'm not out much.
Once I got them home and looked a little closer I realized the Reveal speaker also has an amp in it.
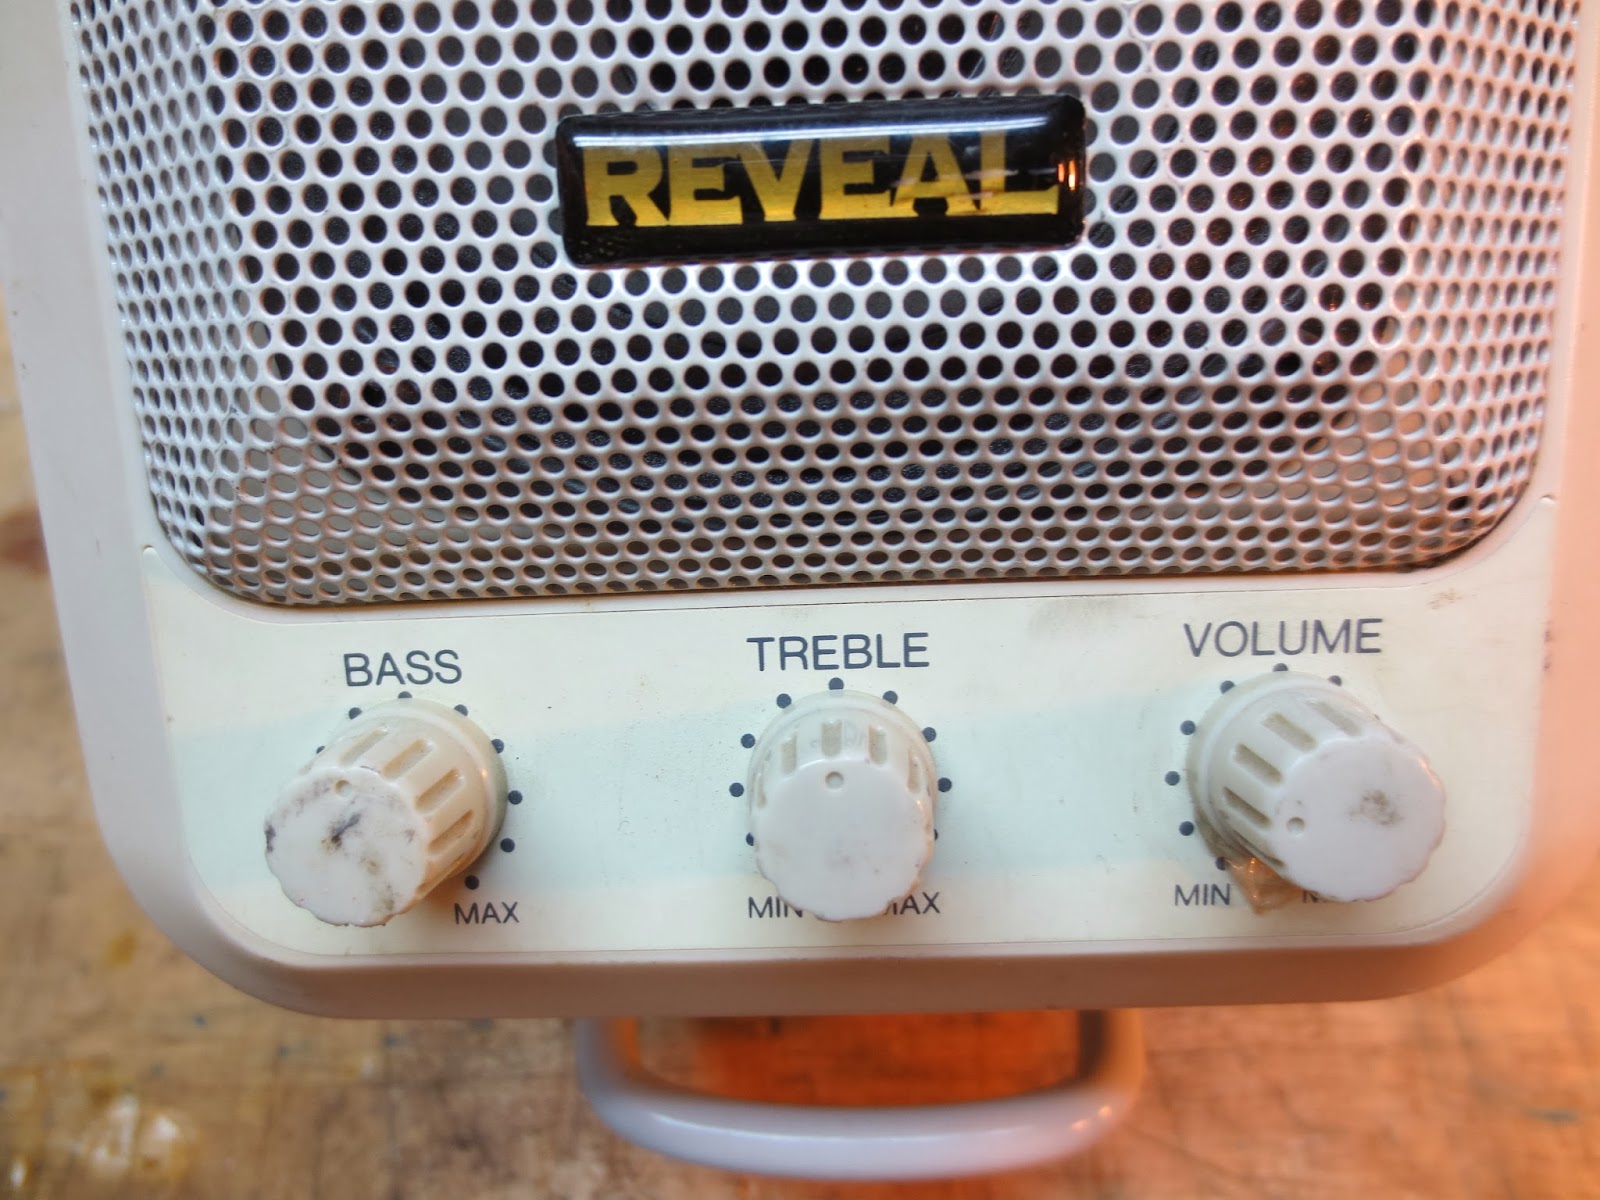
It is a stereo amp with left and right inputs and an out put for the other missing speaker. It needs a 12 volt DC power supply. I had picked up a Universal power supply last week so I have that covered. I plugged it in and the power light came on, I could hear a bit of static when I turned the volume control.... a good sign!

I opened it up to do some detective work, with the power on and the volume cranked up I touched the input wires and could hear static when I touched the white wire. The white wire is the one I want to hook my 1/4" jack to. The red wire is the input for the other channel (the missing speaker)

A quick snip and then solder the wires to my new jack.

The new jack fit in the existing holes.

My new practice amp, it doesn't take up much space.

Thanks for all that; I'm inspired to get out into the workshop and have a go.
ReplyDelete